Showing posts with label tutorial. Show all posts

19.5.11

DIY Laundry Soap

 My supply of ultra luxurious Shaklee Get Clean laundry concentrate was starting to dwindle.  To make it last, I thinned it out with some good-ole homemade stuff.

First, I gathered up my supplies:
  • Borax
  • Washing Soda
  • 1 bar castile soap (or olive soap)
  • Oxi-Clean
  • Tea tree oil (or essential oil of choice)
  • Food processor & measuring cup 

Next, I set up in a well-ventilated area (carport) and put on a mask because there are going to be particles flying around.  Safety first!  


I probably could have/should have worn gloves because the washing soda can irritate your skin, but I didn't and I survived.  Just wash up thoroughly afterward.
 

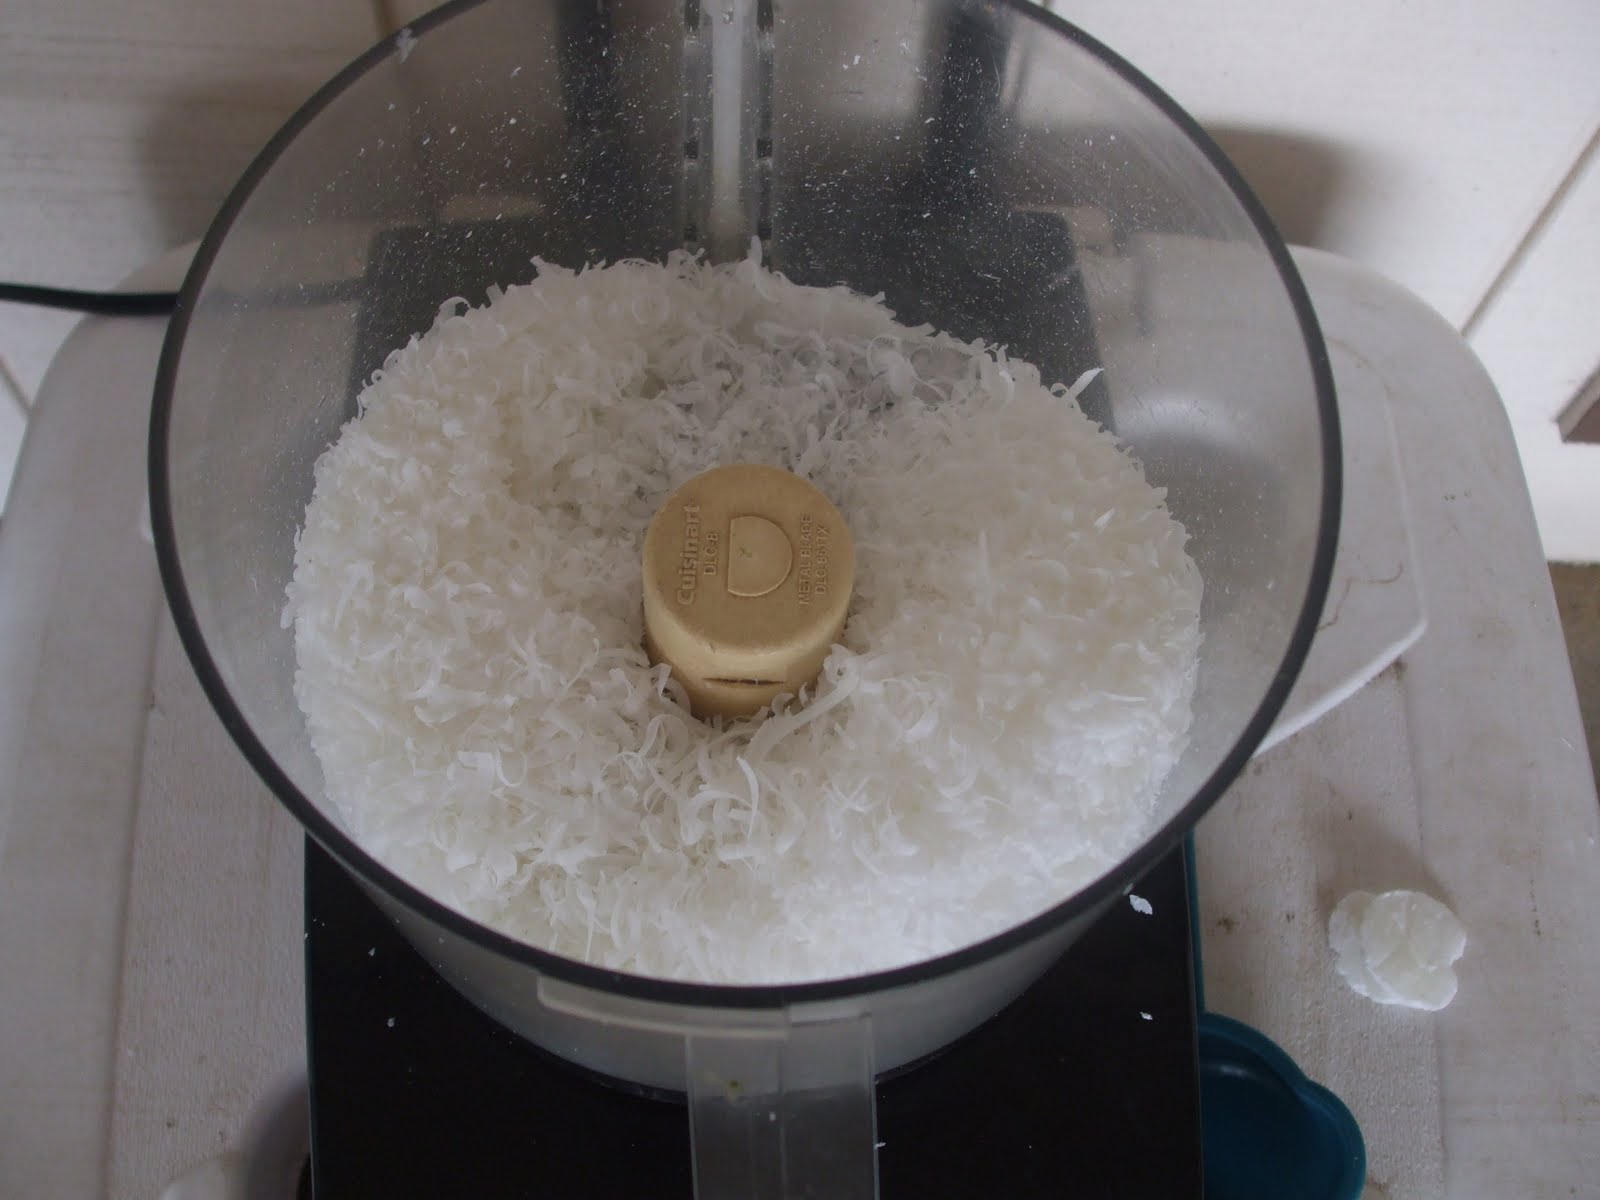
Using the grating disc, grate the bar of soap.  Then replace the grating disc with the S-blade.  Add in 1 cup of washing soda and 1 cup of borax.  Turn it on and let it process until it's a fine powder.


While the processor is doing its business, I like to add some essential oil.  You can add anything that smells good (sometimes I do lavender), but I like tea tree oil because it freshens my laundry machine and it has anti-fungal properties.  Add about 10 drops of oil and let it fully incorporate.

Then I take my finished laundry powder, my box of Shaklee powder, and my oxi-clean.  I add about 1/2 cup of oxi-clean and mix all three together in the box.  Ta-da!  Laundry soap life extended! 

Use about 2 Tablespoons per large load

29.6.10

Wet Bag Made From Shower Curtain (with tutorial link)

Considering we live 10 minutes from year-round beach and we cloth diaper, I can not believe that it has taken me 2 years to make this! Since we replaced our shower curtain this weekend, I used the old one to whip up a wet bag with the help of Dilley Dally's excellent tutorial.

BTW: a "wet bag" is a zippered or drawstring waterproof bag that you put things like bathing suits and used diapers in so your car/diaper bag/whatever doesn't get soaked, too.


Her zipper turned out a million times neater than mine - I encountered some major puckering issues. I also think that using a vinyl shower curtain instead of PUL might have contributed to my problems. But, we make do with what we have around here.


How about this fabric?! Anything with surfing ninjas and lethal musubi is top shelf in my book!

27.4.10

Candy Sushi made from Rice Krispie Treats


CANDY AND FRUIT ROLL UPS... (the pile of bills is unnecessary but adds a certain je ne sais quoi)


PLUS RICE KRISPIE TREATS...


EQUALS CANDY SUSHI!!!

I got this idea from Mommy Knows (and here's a link to the tutorial). It's super easy, super delicious, and super cute! Perfect for parties and potlucks.

12.4.10

How to Make Maternity Pants from Regular Pants


The other day I went to Target in search of some black maternity pants. I only need one pair and I just need it to get me through 5 hours, 3 days a week. Basic black maternity pants are $35.99!

I'm no Frugal Frannie - there are plenty of things I am willing to drop money for - but pants (and especially pants I am only going to wear for 4 months) are NOT one of them.

So here's how I made a pair of maternity pants out of my current basic black pants. I don't know if I would have tried this if I had only one pair of black pants (luckily, I have two) - but I the result is both functional and free, which is what I was going for.


I started by drawing a slightly curved line on the front of the pants - this accommodates belly growth better than just cutting the waist band off straight. Then I cut it out (including the back, which I just cut straight across)
I used the waistband as a guide for cutting out two pieces of material from an old golf shirt (made of stretch knit). I used the shape as a guide by made the panels longer than the original waistband, that way they can be worn either folded down below the belly or up and over it. My preference on this changes from day to day.
I also used the original hem of the shirt, which I use later for the elastic casing - but that was just a shortcut to save time.


Next, I cut one piece of the shirt material straight across and left one curved, so it matches the waist of the pants. This picture does nothing to illustrate that point...
Next I took 3/8" elastic and fed it through just the back panel of material, making sure it was taut but not crazy small.

Right sides together, I basted down the seams, tried it on, and stitched the seams together using a narrow zig zag stitch.


Right sides together again, I pinned the stretch panel to the original waistband of the pants. Baste, try on, and stitch the seam. The back pockets are still functional but you could remove the front pocks and the zipper if you wanted to take bulk off the front of the pants - the openings end up being too small to use.
And voila! Maternity pants and a pregnancy bump update to boot!

About an hour after I finished these my mom called me and let me know that she had just sent me a box with not one, but TWO pairs of black maternity pants. Sigh...

29.3.10

Easy and Cute Hooded Towel (with link to tutorial)

I seriously dislike store bought hooded baby towels. They are small, flimsy, and usually aren't terribly absorbent. Boo! Hiss!

On the other hand, I love handmade hooded towels. So when my college roommate (from days of yore) requested a gift for her cousin - I knew a big fluffy hooded towel would be a hit. It's the perfect mix of practical and adorable.


I can't exactly take creative credit for this particular design. I followed the tute at Prudent Baby dot com.


This accent fabric is great because its whimsical without being too cutesy. I only wish that I had enough left over to make a drawstring bag to wrap the towel in. Oh well...next time. Next time.

15.3.10

How to Use Hydrogen Peroxide (bleach alternative)

My mom forwarded me an email about Hydrogen Peroxide and how to use it around the house - especially as an alternative to bleach. I love using it in my Waterpik but now I think I'm going to start using it in my hair, too. Of course, we use all Shaklee products (Basic G and Basic H) for cleaning, but it seems that the list of HP possibilities goes on and on. Can't do better for 99 cents!


1. Take one capful (the little white cap that comes with the bottle)

and hold in your mouth for 10 minutes daily, then spit it out.
(I do it when I bathe.)
No more canker sores, and your teeth will be whiter.
Use it instead of mouthwash.

2. Let toothbrushes soak in peroxide to keep them free of germs.

3. Clean your counters and table tops with peroxide to kill germs

and leave a fresh smell.
Simply put a little on your dishrag when you wipe,
or spray it on the counters.

4. After rinsing off your wooden cutting board,
pour peroxide on it to kill salmonella and other bacteria.

5. I had fungus on my feet for years until I sprayed a

50/50 mixture of peroxide and water on them
(especially the toes) every night and let dry.

6. Soak any infections or cuts in 3% peroxide for
five to ten minutes several times a day.
My husband has seen gangrene that would not heal
with any medicine but was healed by soaking in peroxide.

7. Fill a
spray bottle with a 50/50 mixture of peroxide and water
and keep it in every bathroom to disinfect without harming
your septic system like bleach or most other Disinfectants will.

8. Tilt your head back and spray into nostrils with your

50/50 mixture whenever you have a cold, plugged sinus.
It will bubble and help to kill the bacteria.
Hold for a few minutes, and then blow your nose into a tissue.

9. If you have a terrible toothache and cannot get to a

dentist right away, put a capful of 3% peroxide into your mouth
and hold it for ten minutes several times a day.
The pain will lessen greatly.

10. And of course, if you like a natural look to your hair,

spray the 50/50 solution on your wet hair after a shower
and comb it through.
You will not have the peroxide-burnt blonde hair like
the hair dye packages but more natural highlights if
your hair is a light brown, reddish, or dirty blonde.
It also lightens gradually, so it's not a drastic change.

11. Put half a bottle of peroxide in your bath to help get
rid of boils, fungus, or other skin infections.

12. You can also add a cup of peroxide instead of bleach

to a load of whites in your laundry to whiten them.
If there is blood on clothing, pour it directly on the soiled spot.
Let it sit for a minute, then rub it and rinse with cold water.
Repeat if necessary.

13. I use peroxide to clean my mirrors.
There is no smearing, which is why I love it so much for this.

14. Another place it's great is in the bathroom, if someone has

been careless & has peed on the floor around the toilet &
it's begun to smell of urine.
Just put some peroxide in a spray bottle & spray.
In the blink of any eye all the smell will be gone &
the bacteria eliminated!

I could go on and on.

It is a little brown bottle no home should be without!

17.2.10

UW lacrosse T-shirt Reconstruction

If you followed Terms of Indifference when I was living in Thailand, you may remember my Wisconsin lacrosse shirt, a gift courtesy my sister. I had to retire it because the cotton started to crust over with the salt from my sweat. But, considering I had worn it at least every other day, I was sure it had lived a good life.


For the past 2 years, even though I never wore it, I kept rescuing my UW LaX T-shirt from the "give away" pile. Lately, I've been drooling over Vegbee's raglan sleeve shirts and this seemed like the perfect project for my most treasured garment.


I used another old shirt from Cambodia for the sleeves (you can vaguely see the pattern on the shoulder) and scraps from a Philly's shirt (circa last year's World Series) for the back. The pattern was 100% eyeballed. I consider this to be acceptable for (my) children's clothes since fit isn't exactly of dire consequence. I also used Vegbees tute for transplanting a polo shirt collar onto a regualar t-shirt. I've never done this before but I like the results!


Clearly, this is closer to a size 3/4 shirt. Ikaika doesn't fit into it now, but he will sooner or later and my Wisconsin Lacrosse shirt will live on!

4.11.09

Healthy Meal: Berry Baby Breakast Smoothie Recipe

In the Arrayan house, we love breakfast!  Food just tastes yummier in the morning.  Digestion is at its peak after a restful night.  Now is the time to give your body food it can use!

Heres a recipe I used this morning for the baby, but its delicious enough for even the most discerning adult.  The thing I love about smoothies is that there is no one way to make them and its very difficult to mess them up.  Its also super easy to sneak extra nutrition in, which is always fun with kids!


Berry Baby Breakfast Smoothie

1C almond milk (any milk will do)
1/2 banana
1/4C blueberries (or berries of choice)
1.5Tbs Shaklee Protein Powder (either flavor)


Add-ins (this is the fun/sneaky part)

1tsp Shaklee Kids Multivitamin Powder
1 tablet chewable Cal-Mag
1Tbs wheat germ
1 squirt flax seed oil

Put it all in a blender and blend until smooth.

Serve with a handful or two of Oat Os for a fanastic, delicious breakfast!

30.9.09

Tutorial: How to Make a Backpack from a T Shirt

I completed a UFO (unfinished object) that has been hanging around my life for the past 10 months. It took about 30 minutes to assemble so I have no clue why it took me so long to finish. It was supposed to be a present for my sisters birthday...in February. Oh well, shes going to be a student of Shorewood High School for at least two more years so theres plenty of time to enjoy it.

On with the tute.


1) Get a tshirt you love and cut a rectangle through front and back. I didnt take exact measurements, but use most of the shirt. It depends how big or small you want the backpack. Also cut two peices the same size from some kind of a lining fabric (jersey knit will stretch like nuts if you put anything of substantial weight in there - ultimately looking wonky and being uncomfortable). I went with the classic stability of cotton.
Save your scraps! You will need them later!


2) With right sides together, sew up the two long sides and one short side of the lining, then do the same for the tshirt.


3) Now you have two "bags". Put them right sides together, one inside the other, and sew along the top edge. But leave a little hole in the hem for turning.


5) Turn the whole deal right side out, stuffing the lining into the bag. Close up the turning hole using a little zigzag stitch or whatever works. Now sew a straight stitch through both the bag and the lining about 1.5 inches from the top.


6) Using the same shirt you cut the rectangles from, lay the scraps out so you can see where the side of the shirt is. Cut two long strips (these should end up twice the length of the shirt because the shoulder seam will keep the front and back connected).


7) either cut a hole near each side seam or just rip the seams on the bag between the top edge and the stitching with a seam ripper- making the holes for your straps. Using a safety pin clipped to the end of one of the strips, thread the strips through the top of the bag - entering and exiting from the same hole. Do the same on the opposite side.
(I put a pocket on the front of this bag - but thats optional)


8) Take the two strings on the left and sew them to the bottom left corner of the bag, leaving about 2 inches of length. Repeat for the right side.


9) tie the two lengths into a nice 'n' pretty bow


10) Pack your bag full of stuff and enjoy!!!

17.6.09

Battle TOFU

Iron Chef blogging challenge with my friend in the mainland began with Battle Tofu. These results are so late because I havent had a single second of spare time in the last few days. I will post the recipes later but here are the dishes and the results (as judged by Mr A)


First off was tofu patties - something I have made before and I know my husband loves but I made them different this time and the results werent an improvement. If it aint broke - dont fix it.

Taste: 7.5 (ouch!)
Presentation: 10
Originality: 8

1 block tofu
1 can tuna (I used salmon, it wasnt as delicious)
4 large eggs
1/2 C mushrooms, finely chopped (I used canned ones)
1/4 C finely chopped onion or 1/2 tsp onion powder (chopped onion is better)
1 tsp salt
1/2 tsp black pepper
1/4 tsp garlic powder (1 clove garlic through a press tastes fresher)
oil for frying

squeeze as much water as possible from the tofu. Break it up and mix with all ingredients expect the oil. Drop ladle full (about 2 tablespoons) into the oil. Fry until both sides are golden brown. Drain on some paper towels.

Tofu pie. We ate it for dessert then had it again for breakfast the next morning. Clearly, I was pressed for time!

Taste: 8
Presentation: 2
Originality: 10

2 C boiling water
2 boxes Jello
1 block soft tofu
About a cup or more of fresh or frozen fruit
2 ready made crusts (I made my own with wheat germ, butter and flour - not as delicious as possible)
1 tub cool whip

Add water to jello and let congeal. Blend jello and tofu in a blender. Add fruit. Pour into pie shells. Set in fridge, top with cool whip.

I used cherry jello and blueberries. Mr A said it was like Pepto Bismol. I would suggest using strawberry with strawberries or lime with crushed pineapple.

21.9.08

Diaper Wipe Recipe

I mixed it all up and put it in a spray bottle. I also hear that you can just soak a roll of paper towels in this solution - put Im wary of doing that before the child is actually here (can these "go bad"?)

1C water
1Tbs Shaklee Baby Shampoo
1/2Tbs Sweet Almond Oil
2 drops Tea Tree Oil

Feel the soothing relief!

Bonus:

Heres a muesli recipe that I mixed up today. This is amazingly filling for a early morning breakfast. Its from a raw cookbook but I like it best because its faster than cooking oatmeal.

4C rolled oats
1C raisins
1/2C chopped nuts (I used almonds and walnuts)
1/4C sunflower seeds
1/4C raw cane sugar

Put it all together in a can or whatever and MIX! I like it with frozen blueberries and milk but its equally good with just milk. I would recommend letting it sit on the table while you shower or something just to soften the oats up a little bit.

I also finally, after a week of being put on the to-do list, finished the crib bumper! Picture coming soon!

18.9.08

Sitzing around the House

A "Sitz Bath", I have discovered, is a contraption that you put into your toilet seat and it kind of lets just your bum sit in this little pool of water. Is that right? (see, I dont even know and here I am blogging about it!)


Did I write about making tea the other week? Well, the other week I was making some tea as a gift for Mr As coworker. Ive never really gotten into herbs before, but I like tea and figured I might as well give it a shot. We have this amazing herb store down the road from us (right next to Trader Joes on 39th, all you PDXers) and they have this Wall-O-Herbs that is literally a huge wall with jars of bulk herbs. Any herb you can imagine, its there. So, because herbs are so darn convenient to obtain, I have taken a shining to making herby things.


Back to Sitzing. I was reading online about herbal sitz bath products and how they can help you feel better after the baby tears all your junk up (eloquent, as always). You basically make a tea out of it and then you can put it into your little Sitz Bath thing, put it in a bucket and sit in it, put it in your bath tub, or put it in your peri-bottle (nonbabymakers: this is a little squeeze bottle you use in lieu of TP after birthing since dry paper is hard and scratchy). Apparently the herbs soothe and assist with a speedy recovery. Sounds good to me!


If you buy sitz bath herbs online its usually around $8 for a 4oz jar. Lame! The hip preggo boutiques around Portland are worse. So how exciting is it for me to have access to the Wall-O-Herbs?! Sure, you can order herbs online in bulk, but I dont find that nearly as exciting and I would think that without any herbal experience, it would seem overwhelming and almost risky.


I went out today and got myself some ingredients based on this recipe I found online last night. I set about putting it all together and there was so much I had to use this old salsa container to store the rest! So for about $15 I have a whole crapload of bath herbs and Im ready to heal!

For those who are curious but dont want to follow the link, this is what I put in there:
rosemary, sea salt, uva ursi, chickweed, marshmallow root, plantain, calendula (marigolds), chamomile, lavender, and yarrow.

Next up, homemade disposable diaper wipes!